Lifesize Room 220/220i - evaluation results main document

SETUP PROCEDURE
The camera (positioned adjacent to a picture monitor) and the Room 220 CODEC together with the LifeSize Phone™ and infra red remote control complete the package. The CODEC includes a varispeed cooling fan which generates some mechanical noise so care is required in positioning the CODEC. Cabling the system was simple and involved:
- Connecting the supplied HDMI and DVI leads between the CODEC and the high definition monitors.
- Connecting the cable between the CODEC and the camera.
- Cabling the Lifesize Phone™ to the CODEC via an RJ45-RJ45 cable.
- Establishing an Ethernet IP network connection through the single RJ45-RJ45 cable.
- Connecting power to the CODEC and camera.
System set up was conveniently configured through the “on-screen” menus via the remote control. IP address, IP Gateway, Subnet mask and Gatekeeper (optional) address were all entered through these menus.
Approximate set-up time: 20 Minutes
Documentation quality: The documentation was concise and easy to follow and included: A printed Quick Reference card, with installation guide on CD. The User Guide is available from the Lifesize website.
The entire set up procedure was straightforward.
Hardware Description
General
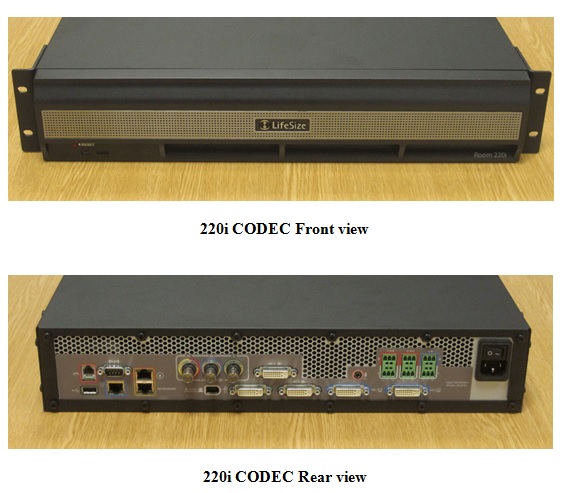
The Lifesize Room 220 is available in two hardware configurations: the standard Room 220 and the installation rack mountable Room 220i. With the exception of the style of connectors on the rear of the CODEC and the removal of an S-Video input on the 220i, the systems overall performance is identical.
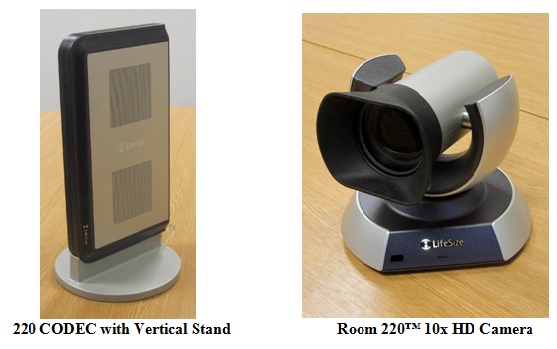
The compact 220 1U deep CODEC may be cabinet mounted horizontally under a picture monitor or vertically on the supplied stand; it cannot be rack mounted without additional shelving; the 2U high 220i is designed to be rack mounted. The system is an IP only unit with a single 10/100/1000 Mbit/s, auto switching, Ethernet connection, enabling single site connection speeds of up to 8 Mbit/s, or multi-site (MCU) connections with a total site bandwidth of 8 Mbit/s. The Ethernet port may be manually configured or set to auto negotiate.
An optional LifeSize Networker™ IP/ISDN gateway will provide H.320 ISDN connectivity if required. This option was not tested during the evaluation.
The CODEC supports over 200 video resolutions including:
- The basic CIF format resolution of 352x288 pixels
- wCIF at 400x244
- w288p at 512x288
- w432p at 768x432
- w480p at 848x480
- High definition (HD) w720p, 1280x720
- High definition (HD) w1080p, 1920x1080
The following display resolutions and maximum frame rates are supported:
- 1280 x 720p 60fps
- 1280 x 768p 60fps
- 1920 x 1080p 30fps
- 1920 x 1080i 60fps
Monitors used during the evaluation did not support 1080p, 30 frames /second, so all 1080 images were viewed at a display resolution of 1080i, 60fps.
When the HDMI monitor inputs were used there were situations where images appeared cropped on some layouts. This was particularly an issue with PC presentation material and was resolved by using the DVI monitor inputs.
Single and dual picture monitors are supported together with HDMI, DVI-D and DVI-I high definition outputs.
The HDMI and DVI-D connections include the main audio output signal but additional analogue audio outputs are also provided.
The main video output includes on-screen menus and the soft key icons corresponding to the four colour-coded buttons on the remote control.
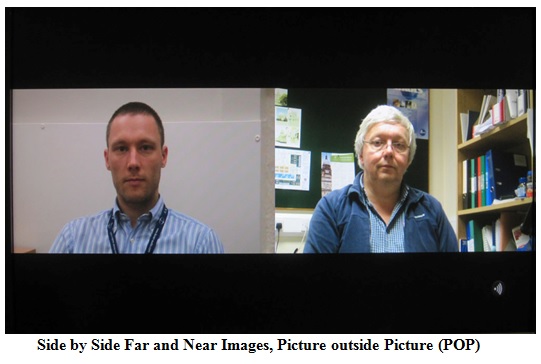
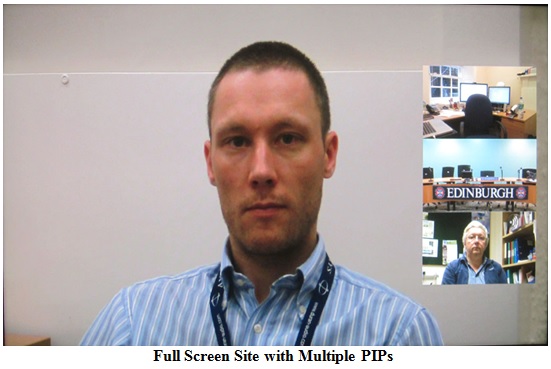
Both Picture in Picture (PIP) and Picture outside Picture (POP) display formats are offered which allows both near and far end images to be displayed simultaneously on a single picture monitor.
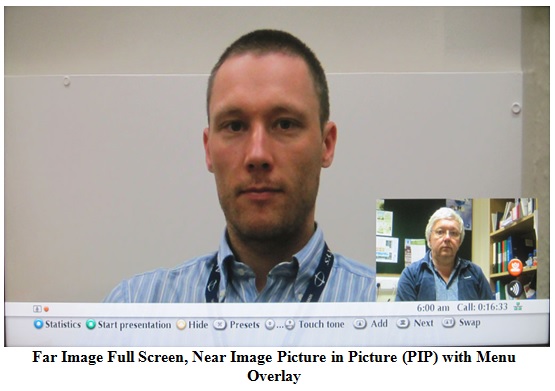
In single monitor mode the “layout-button” on the remote control cycles between a number of screen display layouts. Picture in Picture (PIP) may be set to be On, Off or Auto. In Auto when a change in the picture is detected, the PIP and on-screen menu are displayed for a user definable time and then both fade out, - default fade time is 10 seconds.
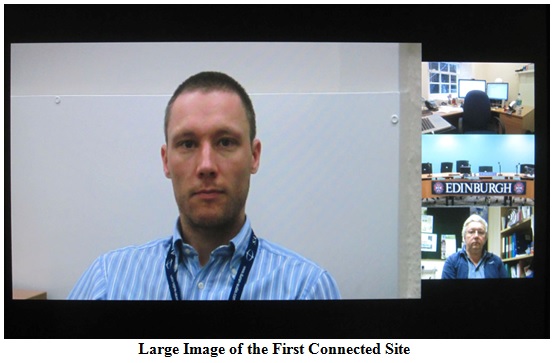
With the main camera only being transmitted there are 3 screen display layout options:
- Full screen far end image + PIP of near end image
- Full screen near end image + PIP of far end image
- Side by side near and far end images
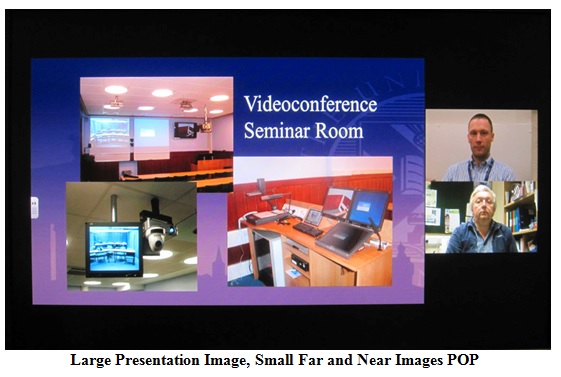
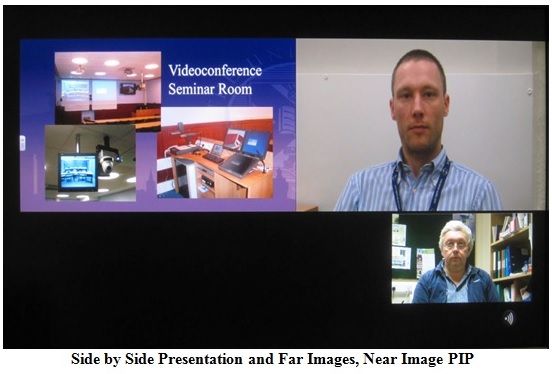
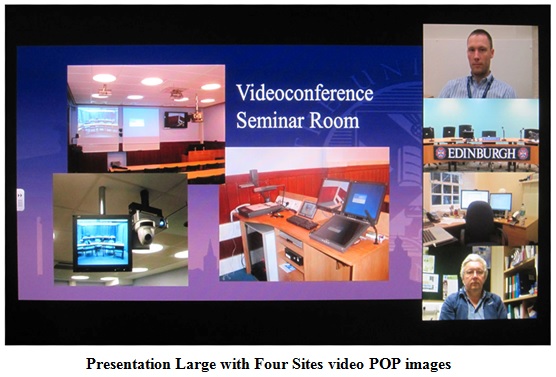
When an H.329 presentation image together with the main camera image are either transmitted or received seven screen display layout options are available:
- Large presentation image plus small near and far end images POP
- Large far end image plus small presentation and near end images POP
- Large near end image plus small presentation and far end images POP
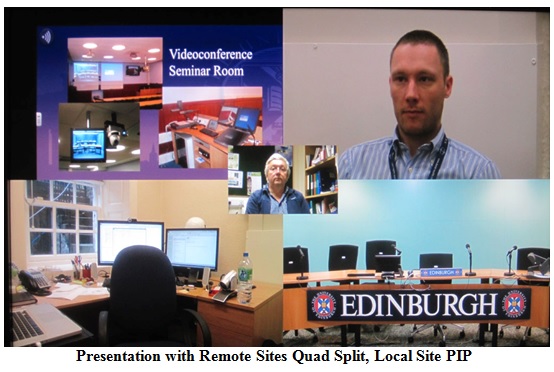
- Presentation image full screen plus near and far end images as PIPs
- Far end image full screen plus presentation and near end images as PIPs
- Near end image full screen plus presentation and far end images as PIPs
- Presentation and far end images side by side POP and near end image as a PIP
In dual monitor mode if the second monitor has its display set to
“Calls +Presentations +DVI-I”, the monitors display the following images:
|
Main Monitor |
Second Monitor |
|
|
Not in a call |
Near image + menu |
Source connected to the DVI-I input |
|
In a call with no presentation material |
Far image + menu |
Near Image |
|
In a call with presentation material transmitted or received |
Full screen far image + PIP of near end image Full screen near image + PIP of far end image Far image + Near image side by side |
Presentation material |
The LifeSize 10x HD camera features pan, tilt and zoom functions with a wide horizontal viewing angle of 70 degrees and connects to the CODEC through the standard 3 metre HDMI cable. As an option this cable may be extended up to a maximum of 10 metres. The 10x camera is more sensitive than earlier LifeSize 1080p examples and produces good results at lower lighting levels. Ten camera pre-set positions may be recalled from the remote control or the Lifesize Phone touch screen.
The camera menu includes a range of manual settings for exposure, white balance and anti-flicker. If a second camera is connected via the CODEC’s fire-wire ‘type’ input connector, this input is restricted to supporting 720p cameras only.
The CODECs vari speed cooling fan generates some noise so care is required in positioning the CODEC within the room.
The CODEC supports both remote camera control and remote video source selection.
A PC may be interfaced directly via the DVI-I/VGA connector on the rear of the CODEC. Although no supported resolutions or frame rates are specified, EDID reported the following main resolutions and recommended 720p on both.
|
VGA |
DVI-I |
|
800 x 600 |
800 x 600 |
|
1280 x 720 |
1280 x 720 |
|
1280 x 1024 |
1600 x 900 |
|
1920 x 1080 |
During an H.323 call a second unidirectional video channel (dual stream) is provided through the H.239 protocol. Thus video from the camera and a PC could be transmitted simultaneously. The bandwidth split between main and H.239 channels may be defined by the user. Any input may be user selected on the Main and Presentation channels.
The MultiSite (MCU) offers up to eight-site H.323 MCU conferences, the host Lifesize Room 220™ system plus seven other remote sites. The speed of each site connection is dependent upon the number of sites in the MCU conference and the overall connection bandwidth. Audio bridging (for telephone calls) is also provided into conferences by connecting a standard telephone line to the CODEC.
Several audio formats are supported by the LifeSize system, including the ITU standard MPEG-4 AAC-LC, giving 16KHz analogue audio.
The second generation LifeSize Phone™ provides the videoconference microphone together with a fully featured conference telephone. A standard telephone line may be connected to the CODEC or it will operate as a SIP phone. Full system control is also provided via the 4.3” multitouch display.
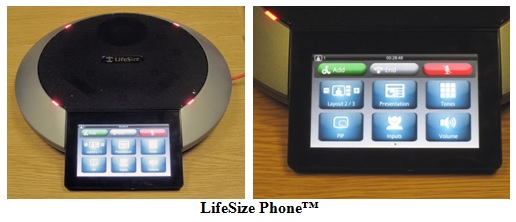
The LifeSize Phone™ incorporates four microphones in a circular microphone array with beam forming for high directivity. The unit can also radiate far end sound through its internal loudspeaker but the speakers on the picture monitor or an external audio system may be preferred for this task in video calls.
Mini jack connectors allow for straightforward integration with standard PC audio via the auxiliary line inputs on the Room 220, the Room 220i provides balanced audio inputs via Phoenix connectors.
A Kensington lock is provided on the rear of the Room 220 CODEC for added security.
SYSTEM OPERATION
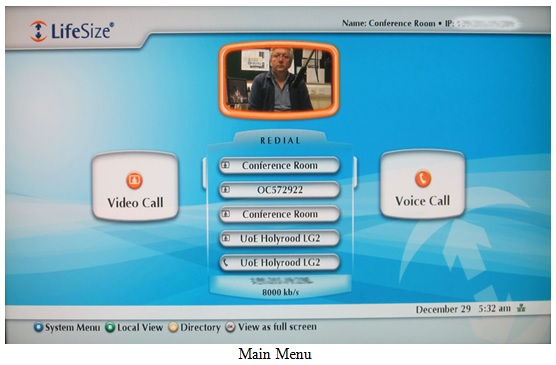
The system may be controlled either locally from the remote control, the multitouch display on the Lifesize Phone™ or from another location over the network. The system includes an RS232 port for integration with a room control system; this integration facility is also available via a network connection.
The remote control includes four context sensitive colour coded buttons: triangle, square, circle and return, the function of each button is indicated by the on-screen menu bar. This indication is vital as the function of each button can change depending on how the system is used.
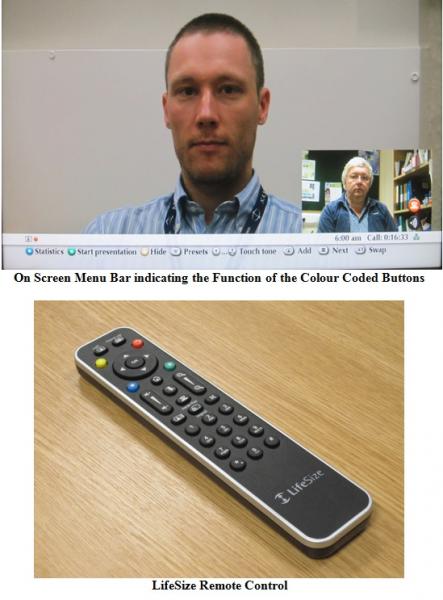
There are dedicated buttons for Call, Hang up, Microphone mute, Near/Far camera, Display layout, Volume, Zoom and Input select. Selecting Microphone mute cuts the sound both from the microphone and the auxiliary audio input. The camera has up to 10 pre-set positions which are stored and recalled via the remote control.
The system takes two minutes forty seconds to boot up from cold. When not in a call the system automatically reverts to screensaver mode after a user-definable period of 1, 10, 20 30 minutes or never, sleep mode may also be activated after 1, 10, 20 or 30 minutes, 1, 2, 3 or 4 hours of inactivity. An incoming call or pressing a remote control button will then return the system to active mode.
The Statistics menu displays call status data including resolution, connection speed, compression protocols, packet loss and frame rate for the main video channel. Frame rate information is not available for the second H.239 channel.
In wide screen mode, a 4 x 3 aspect ratio video image transmitted from a computer is displayed on a widescreen monitor with the familiar black bars on each side of the image. To minimise this effect the CODEC has a “Video Stretch” facility that stretches the image horizontally to fill the available wide screen display resulting in lateral distortion of the image.
An H.239 connection is initiated by selecting “Presentation Start” through the remote control and the on-screen graphical interface. The main camera normally occupies one channel and another selected image source, the second channel. The remote site then receives separate images for display on two monitors. Any input may be user selected on the Main and Presentation channels.
During tests between Lifesize Room 220 systems, the second H.239 channel using the DVI-I input achieved a maximum resolution of 1280 x 720 pixels at around 15 frames per second (the system statistics do not report H.239 frame rate). At high connection speeds and with the bandwidth allocation set to 50:50 (camera: presentation material) this effect was still evident. Increasing the overall bandwidth to 6 or 8Mbit/s did not increase this frame rate above the estimated 15fps; it did, however, improve the overall quality by reducing image artefacts. Where frame rate is critical on presentation material, consideration should be given to transmitting it on the main channel which will deliver 30 fps. Alternatively using the HD2 input, HDMI on the 220 and DVI-D on the 220i, resulted in high frame rate presentation material being viewed at the far end.
Controlling an MCU conference is a simple procedure:
1. Select the “Call” button during a conference
2. Enter the number of the additional site into the call menu or select the site from the directory or the recent call list.
3. The additional site will then be connected to the conference.
Individual calls or all connections may be disconnected using the graphic interface.
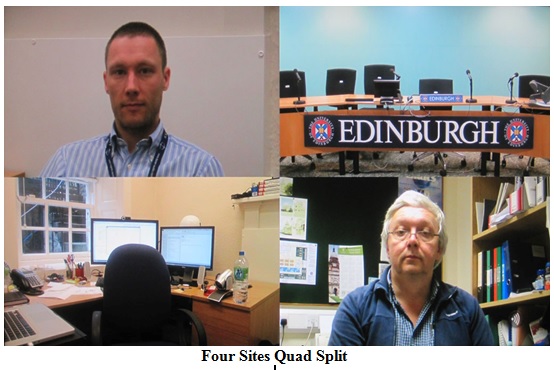
The MCU operates in continuous presence mode only and shows video from a maximum of four sites: three far end participants and the near end. Where more than four sites are involved, the additional sites will switch into view when they become the current speaker. The Room 220 provides a number of screen layouts in Single monitor mode:
- Traditional quad split of the four sites
- Large far end Voice Switched image plus additional images POP
- Large near end image plus additional images POP
- Full Screen far end Voice Switched image plus additional images PIP
- Full screen of any site and PIP images of the other three
When presentation material is displayed, additional layouts are available:
- Large presentation image plus additional images POP
- Large far end Voice Switched image plus additional images POP
- Large near end image plus additional images POP
- Full Screen presentation image plus additional images POP
- Full Screen far end Voice Switched image plus additional images PIP
- Full screen of any site and PIP images of the other three
- Quad split Presentation plus far images, near image PIP
In Dual Monitor Mode the Presentation material is displayed on the second screen.
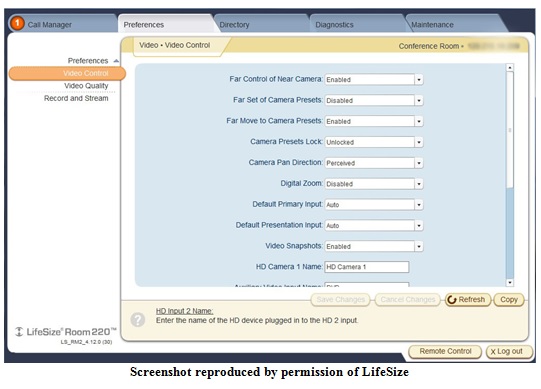
Remote Configuration and Monitoring
Remote configuration, control and monitoring is available via a web browser with password protection - a useful tool for configuring the system and remote monitoring of calls. Call status, diagnostic information, and web snapshots of input and output images together with the ability to initiate and terminate calls are available through the web interface. A fully functional web version of the remote control is also available.
Remote Configuration Screen Shot
Remote Web Snapshots with Statistics
VIDEO TESTS SUMMARY
The overall video quality of conference images was good but the appearance of the default 720p @60 fps images was preferred to the higher resolution 1080p @30 fps. The quality of standard videoconference type material at 2Mbit/s and above was also very good, fast moving movie trailer material transmitted on the main channel at 8Mbit/s was excellent.
The perceived restriction of presentation channel frame rate using the DVI-I input to ~15 frames per second - even at the highest connection bandwidth - may require that motion sensitive presentation video has to be transmitted on the main channel. Alternatively, using the HD2 input, HDMI on the 220 and DVI-D on the 220i, resulted in high frame rate presentation material being viewed at the far end.
AUDIO TESTS SUMMARY
Setup The echo canceller is fully automatic in operation. The quality of echo cancellation and doubletalk was excellent.
|
Lecture Theatre |
Room |
|
|
Audio levels adequate? (Yes/No) |
Not tested |
Y |
|
Audio quality acceptable? (Yes/No) |
Not tested |
Y |
|
Echo cancellation acceptable? (Yes/No) |
Not tested |
Y |
|
Quality of double talk |
Not tested |
Excellent |
INTEROPERABILITY
There were no problems connecting between the LifeSize Room 220 units.
Time to Connect
All speeds - 10 seconds
Connectivity with Other Machines (models listed with comments)
Successful connections were made in each direction with the following CODECs, where the systems supported H.239, presentation material was also shared.
|
CODEC |
Call Bandwidth |
Resolution Transmitted by The Room 220 |
Resolution Received by The Room 220 |
|
Tandberg 6000 MXP* S/W F9.0 PAL |
3 Mbit/s |
880x496 @ 30 |
w720p @ 30 |
|
Cisco SX20 S/W TC5.1.4 |
6 Mbit/s |
W720p @ 30 |
w720p @ 30 |
|
Cisco C40 S/W TC6.0.1 (No Premium Res) |
6 Mbit/s |
w720p @ 30 |
w720p @ 30 |
|
Cisco C60 (Prem Res) S/W TC4.2.1 |
6 Mbit/s |
w720p @ 30 |
w720p @ 30 |
|
Cisco C90 (Prem Res) S/W TC4.2.1 |
6 Mbit/s |
w1080p @ 30 |
w720p @ 25 |
|
Lifesize Express 220 S/W 4.9.00 |
4 Mbit/s |
w720p @ 60 |
w720p @ 60 |
|
Lifesize Room 200 S/W 4.7.10 |
6 Mbit/s |
w720p @ 60 |
w720p @ 60 |
*H.239 presentation material could not be received at the Room 220 from the Tandberg 6000MXP
Connectivity with the Janet Videoconferencing System
H.323
The Lifesize Room 220™ connected successfully to the Janet Codian MCU at high definition using H.264 video, 720p resolution and AAC-LC audio with video and audio in both directions.
H.239 also interoperated correctly. The received audio level was measured as peaking to -4dBm.
Procedure for making a call
- Press Call button on the remote control
- Select connection speed/quality (the system defaults to auto)
- Input IP address or E.164 number
- Press the OK button
Or use the Local Contacts directory available from the user interface. A recent calls list is also available.


